Stable DNN architectures for mitochondria segmentation (Paper)
This tutorial describes how to reproduce the results reported in our paper to make semantic segmentation of mitochondria in electron microscopy (EM) images:
Franco-Barranco, Daniel, Arrate Muñoz-Barrutia, and Ignacio Arganda-Carreras. "Stable
deep neural network architectures for mitochondria segmentation on electron microscopy
volumes." Neuroinformatics 20.2 (2022): 437-450.
Problem description
The goal is to segment automatically mitochondria in EM images as described in Semantic segmentation. This is a semantic segmentation problem where pairs of EM image and its corresponding mitochodria mask are provided. Our purpose is to segment automatically other mitochondria in images not used during train labeling each pixel with the corresponding class: background or foreground (mitochondria in this case). As an example, belown are shown two images from EPFL Hippocampus dataset used in this work:
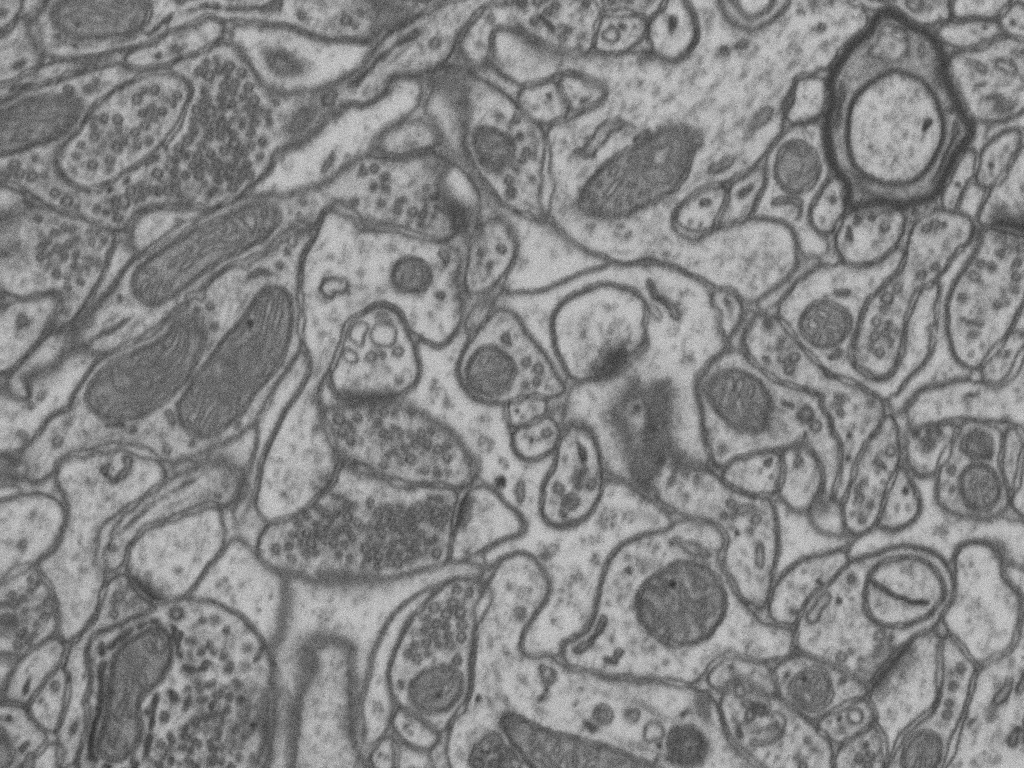
EM tissue image |

Corresponding mask |
Installation
Apart from the steps described in Installation, to reproduce exact results of our paper you need to use the V1.0 version of our library. For that, you simply need to run this command in the terminal
git checkout v1.0
Data preparation
There are differents datasets used on the above work:
Prepare the data as described Data structure.
Choose a template
You can use any of the templates from our V1.0 version of BiaPy in the templates folder.
In case you are interested in reproducing one of the state-of-the-art works implemented in our manuscript, you can use the templates prepared on each case:
How to run
The procedure to run the library is slightly different as it is now for the last version of BiaPy. In this version, the library name was EM_Image_Segmentation and there were no YAML based configuration files to run it.
Open a terminal as described in Installation. For instance, using 2d_semantic_segmentation.yaml template file, the code can be run as follows:
# Path to the code
code_dir="/home/user/BiaPy"
# Path to the dataset
data_dir="/home/user/dataset"
# Path where the output data will be generated
job_dir="/home/user/out_dir"
# Just a name for the job
job_id="400"
# Number that should be increased when one need to run the same job multiple times (reproducibility)
job_counter=1
# Number of the GPU to run the job in (according to 'nvidia-smi' command)
gpu_number="0"

# Load the environment
conda activate DL_EM_base_env

python -u template.py \
    $code_dir \
    $data_dir \
    $job_dir \
    --id $job_id \
    --rid $job_counter \
    --gpu "$gpu_number"
You can use the following notebook: ![]()
Results
The results follow same structure as explained in Results.
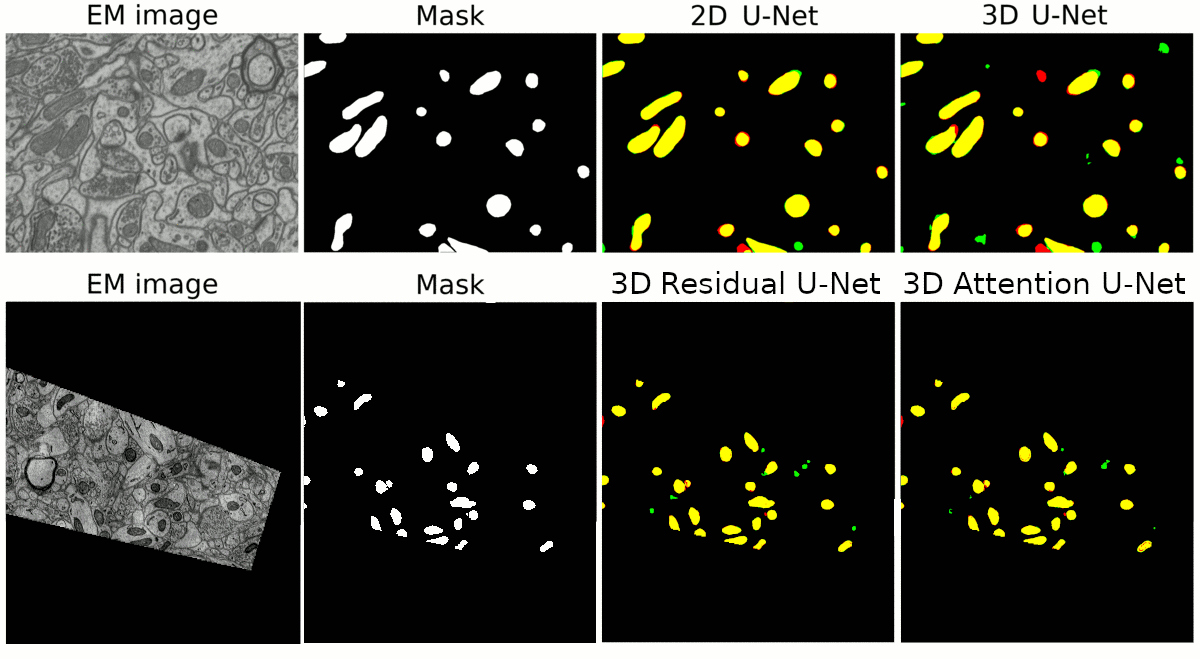
Results of different models used in the manuscript.